
Seeing the northern lights is a memorable experience, and many Android phones now have cameras capable of capturing this natural display. However, taking clear photos of auroras can be challenging because they appear in dark skies with changing light patterns.
Before heading outside, prepare your phone settings, choose the right location, and follow a few simple techniques. If your camera struggles because of hardware issues, such as a damaged lens or faulty sensor, professional Cell phone repair may help restore your phone’s camera performance.
1. Check Your Android Camera Settings First
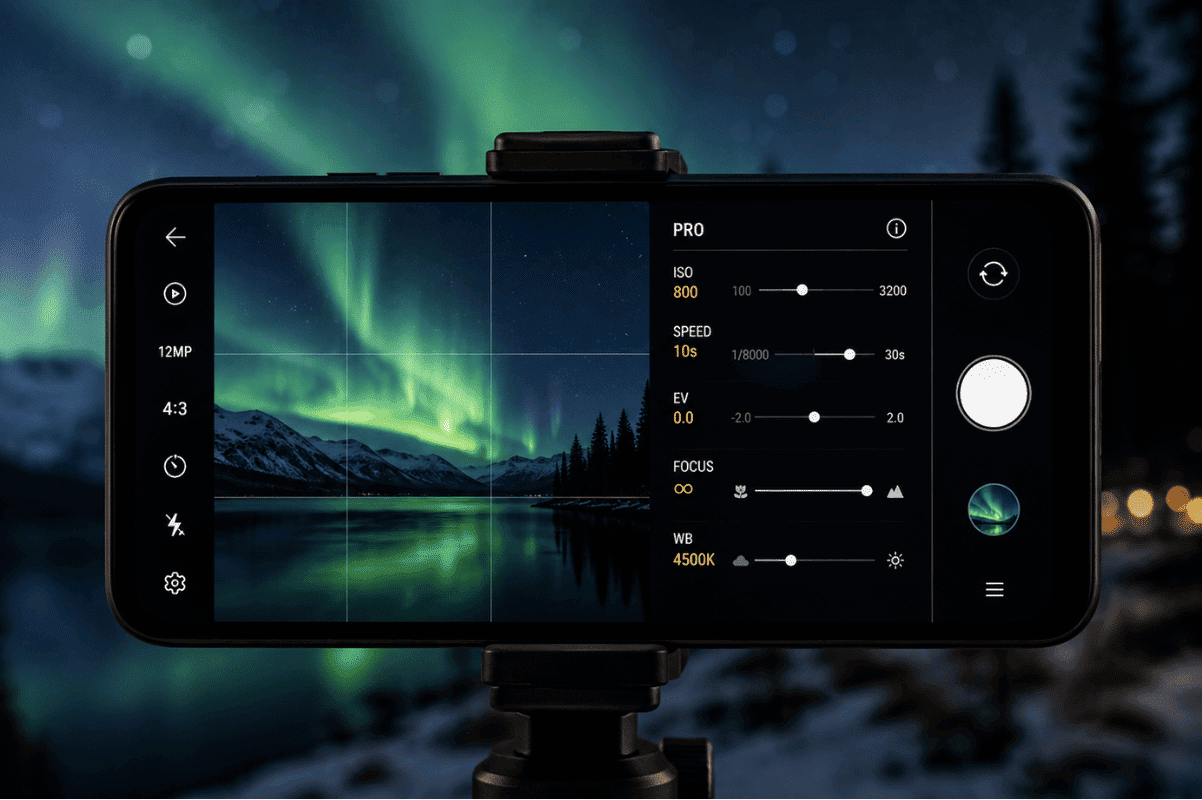
Before trying to photograph the northern lights, open your camera app and check what options are available. Many Android phones include a Pro Mode or Manual Mode that allows you to control settings.
Look for these options:
- ISO control
- Shutter speed adjustment
- Manual focus
- White balance settings
- Night mode
If your phone has a dedicated Night Mode, test it before your trip. This feature helps capture more light in dark environments by combining multiple exposures.
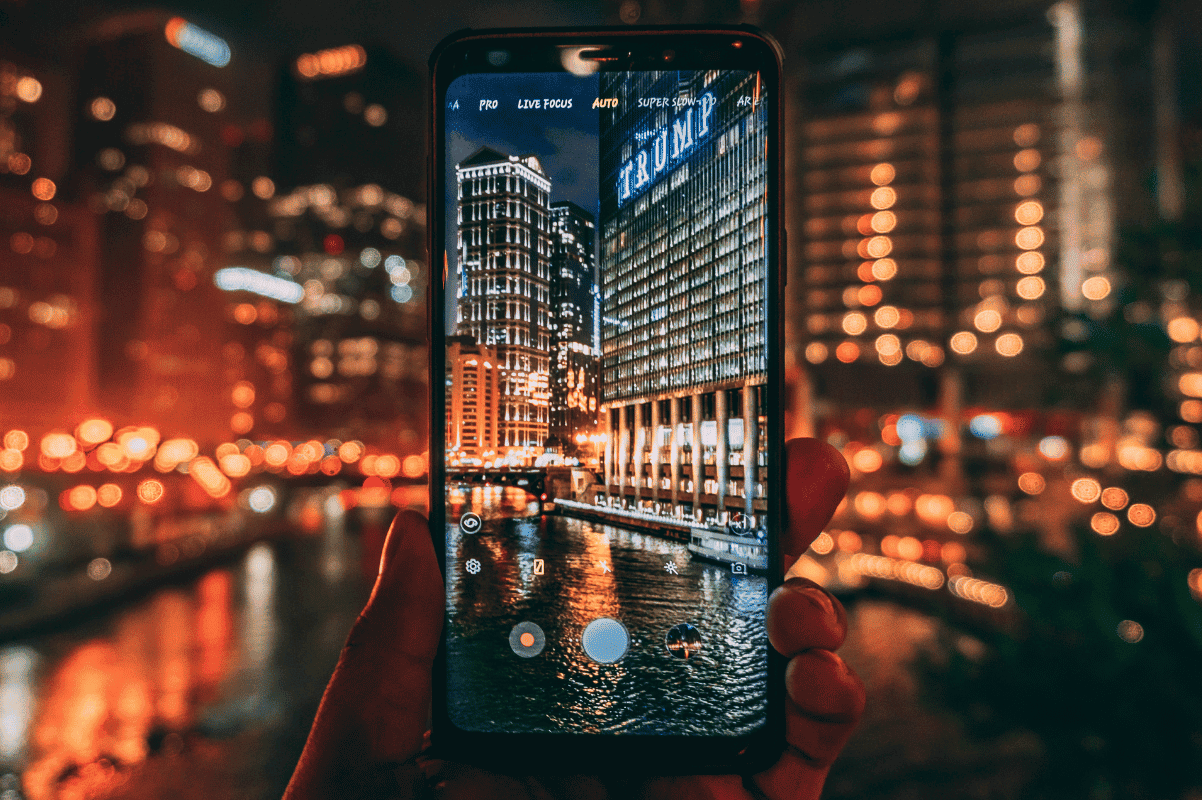
2. Use Night Mode or Pro Mode
Night Mode is the easiest option for most Android users. It automatically adjusts the camera settings to collect more light and reduce noise.
For better control, use Pro Mode if your phone supports it. Start with these settings:
- ISO: Begin around 800 to 1600 and adjust based on brightness
- Shutter speed: Try 5 to 15 seconds
- Focus: Set to infinity if available
- White balance: Adjust depending on the colour of the aurora
Avoid using the regular photo mode because it may make the northern lights look faint or blurry.
3. Keep Your Phone Completely Still
Long exposure photography requires stability. Even small movements can make your photo blurry.
For better results:
- Use a small tripod designed for smartphones
- Place your phone on a stable surface
- Use a timer option to avoid shaking the phone when pressing the shutter button
If you do not have a tripod, lean your phone against a stable object like a rock, bench, or bag.
4. Find a Dark Location Away From City Lights
Light pollution can make northern lights harder to capture. Move away from streetlights, buildings, and busy areas whenever possible.
Choose a location with:
- A clear view of the northern sky
- Minimal artificial lighting
- Few obstacles like tall buildings or trees
A darker environment allows your Android camera to capture more colours and details.
5. Clean Your Camera Lens Before Taking Photos
A small amount of dust, fingerprints, or moisture on your camera lens can reduce image quality. Before taking photos:
- Wipe the lens gently with a microfiber cloth
- Remove any protective camera cover that affects clarity
- Check for scratches or cracks on the lens glass
A damaged camera lens may create blurry images, light streaks, or unwanted reflections.
6. Avoid Using Flash and Digital Zoom
The flash on your phone will not help capture northern lights because the aurora is far away in the sky. It can also reduce the quality of nearby landscape shots.
Digital zoom should also be avoided because it enlarges the image by reducing detail. Instead:
- Move closer to foreground objects if you want composition
- Crop the image later using editing tools
7. Use RAW Format If Your Phone Supports It
Some advanced Android phones allow photos to be saved in RAW format. RAW files keep more image information compared to standard JPEG files.
This gives you more flexibility when editing:
- Adjust brightness
- Improve colours
- Reduce noise
- Recover shadow details
RAW photography is especially useful when the northern lights appear weak or change quickly.
8. Keep Your Phone Battery Warm
Cold temperatures can drain smartphone batteries quickly. If you are photographing outdoors in winter:
- Carry a portable power bank
- Keep your phone in an inside pocket when not in use
- Avoid leaving the phone exposed for long periods
A low battery can cause your phone to shut down before you capture the best moment.
9. Know When Your Phone Needs Professional Help
If your Android camera produces consistently blurry photos, cannot focus, shows black images, or has camera errors, the issue may not be related to settings.
Common camera problems include:
- Damaged camera lens
- Faulty camera module
- Software problems
- Internal connection issues
In these situations, a Local top rated phone repair store can inspect the device and determine whether the camera can be repaired or replaced.
10. Edit Your Northern Lights Photos Carefully
After capturing your photos, small edits can improve the final result. Avoid over-editing because it can make the aurora look unnatural.
Helpful adjustments include:
- Increasing brightness slightly
- Improving contrast
- Reducing image noise
- Adjusting colour balance
Many Android phones include built-in editing tools, while other apps offer additional controls.
Capturing northern lights on an Android phone requires preparation, the right camera settings, and a steady hand. Using Night Mode, Pro Mode, and a stable setup can significantly improve your results.
If your phone camera is not working properly despite trying these steps, a professional inspection can help identify the problem and get your device ready for your next outdoor photography experience.
